This is a step-by-step tutorial for a DIY crown made with a glue gun and wire. You can custom make a crown for yourself or the kids! This seashell crown craft is a great idea for kids who want to look like royalty, a birthday party pre-wedding parties, or even for Halloween and costume parties. It would also be a fabulous DIY mermaid crown! It is always fun to find cool ways to use your seashells!
DIY Shell Crown Craft Tutorial:
What you will need for your DIY Crown:
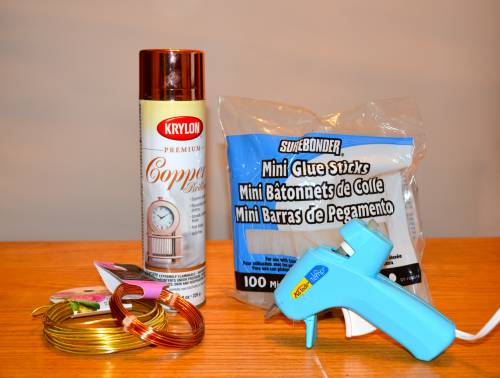
- Wire that is around 16G-12G
- A hot glue gun
- Glue sticks
- Spray paint, rose gold or copper (optional)
- Decorative pieces (optional) For this DIY gem and seashell crown that I made, you would need seashells pearl beads, and rhinestones.
Tools:
- Wire cutters
- Needle nose pliers
All products used to make this mermaid seashell crown can be found at any craft store. Little girls will just love this magical mermaid tiara.
Beautiful SeaShell Crown DIY Craft Step By Step Instructions:
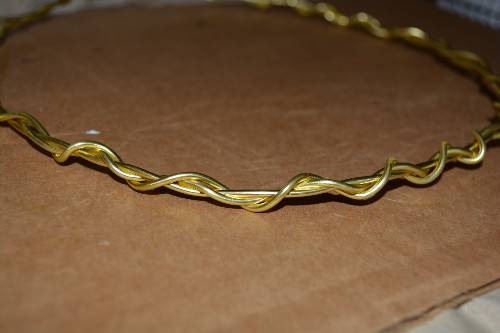
1. Unravel the wire and wrap it around your head where you would want to place the crown. You will need to cut 1-2 inches extra in addition to the measurement of your head. Cut 2-3 pieces of wire this length. Measuring the wire to head allows for a customized, comfortable fit.
2. With the 2-3 pieces of wire you will want to braid or wrap them around one another. The more wire you use the thicker your ‘skeleton’ will be. Once you have finished wrapping the wires make sure the crown will still fit around your head. If the crown fits then move on to the next step.
3. In this step you can be creative. I decided to take different lengths of wire and attach them to the base of the crown. If the wire is not sticking in the direction you want it to go do not worry that is where the glue comes in.

4. Once you have your overall shape, or skeleton, you can begin fixing it into place. Plug your glue gun in! You will want to glue around the area where the wires meet. This will keep its shape while you add more glue and shape the rest of the crown.
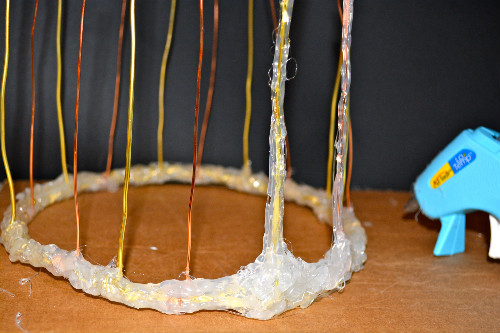
5. Once you have the wires sticking in the direction you want them to go, you can begin gluing where and how you want. Be creative and add texture and thickness to your crown.
6. Optional. Feel free to add to your crown for decoration and more texture. I used seashells, coral shaped beads, and pearls.
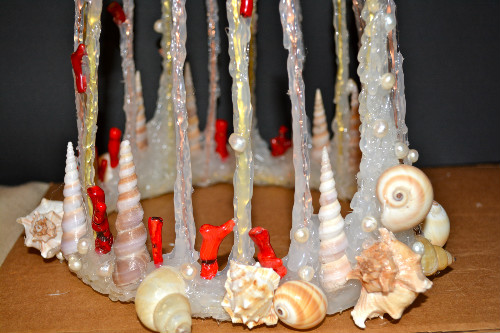
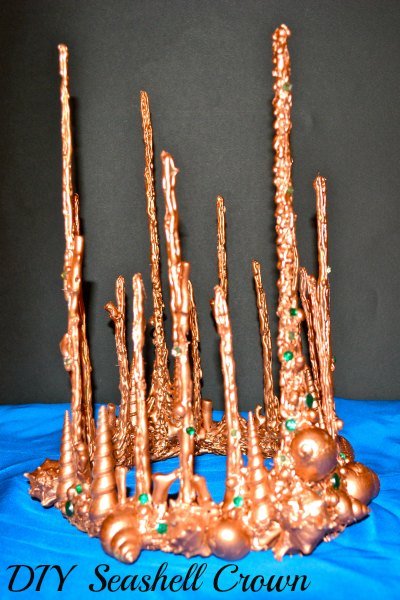
7. Next, spray paint your seashell crown. If you want to add decoration you can do that before or after you spray paint, or you can do both. Remember, this is YOUR creation!
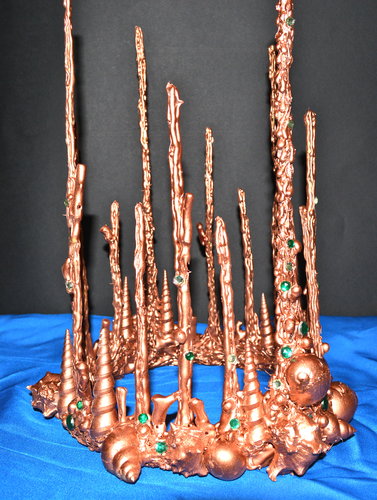
8. When spray painting please remember to be in a well ventilated area or outside. Choose any color(s) you would like! I chose copper. Also, I like to spray paint on top of a large piece of canvas rather than the grass or sidewalk.
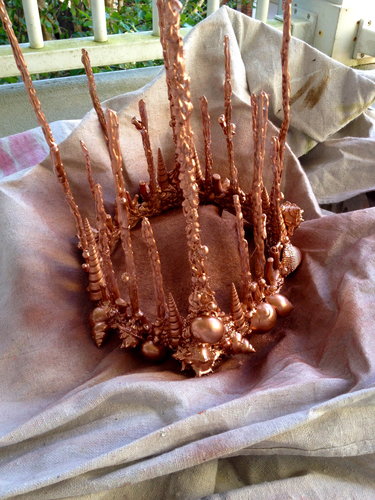
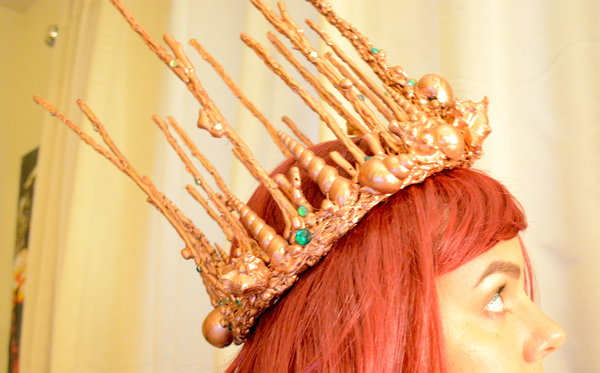
9. Wait for 20-30 minutes and you can be finished here or continue to add! I decided to add different sized gemstones in emerald green, aqua and pale yellow-green to my seashell crown.
10. Finally, have fun and enjoy your DIY crown!
DIY Crown Conclusion
This is such a fun way to use your seashell haul from your last beach trip. It makes a beautiful lasting headpiece that is great for show or for wearing. This DIY crown can be used as a DIY mermaid crown or seashell tiara.
Do you like this seashell craft? Have you made anything using a glue gun? If yes, what did you make? If you make a DIY seashell crown, what will you use as your theme?
Related Posts:
Four Easy Crafts To Do With Kids
How To Make A Child’s Apron- An Easy And Adorable DIY Project!